

How to get a perfect joint in a curtain wall
DRAW THE CURTAIN WALL
Draw a curtain wall with two elements crossing at 90° (other angles can be quite difficult to sort out, but not impossible)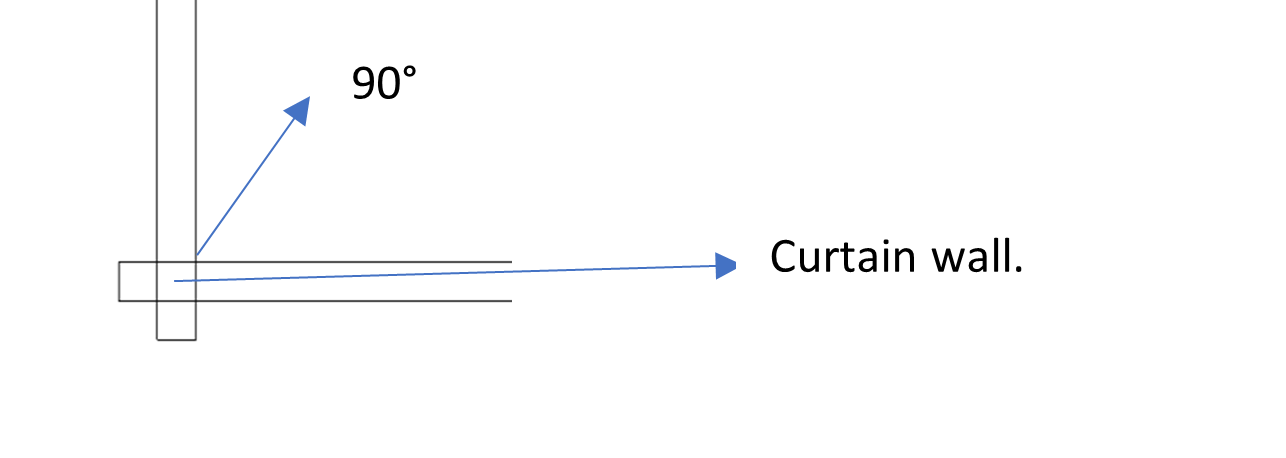 DISALLOW THE JOINT
Select one of your CW, click right on the little BLUE circle at the end of it and then click again on “disallow joint”
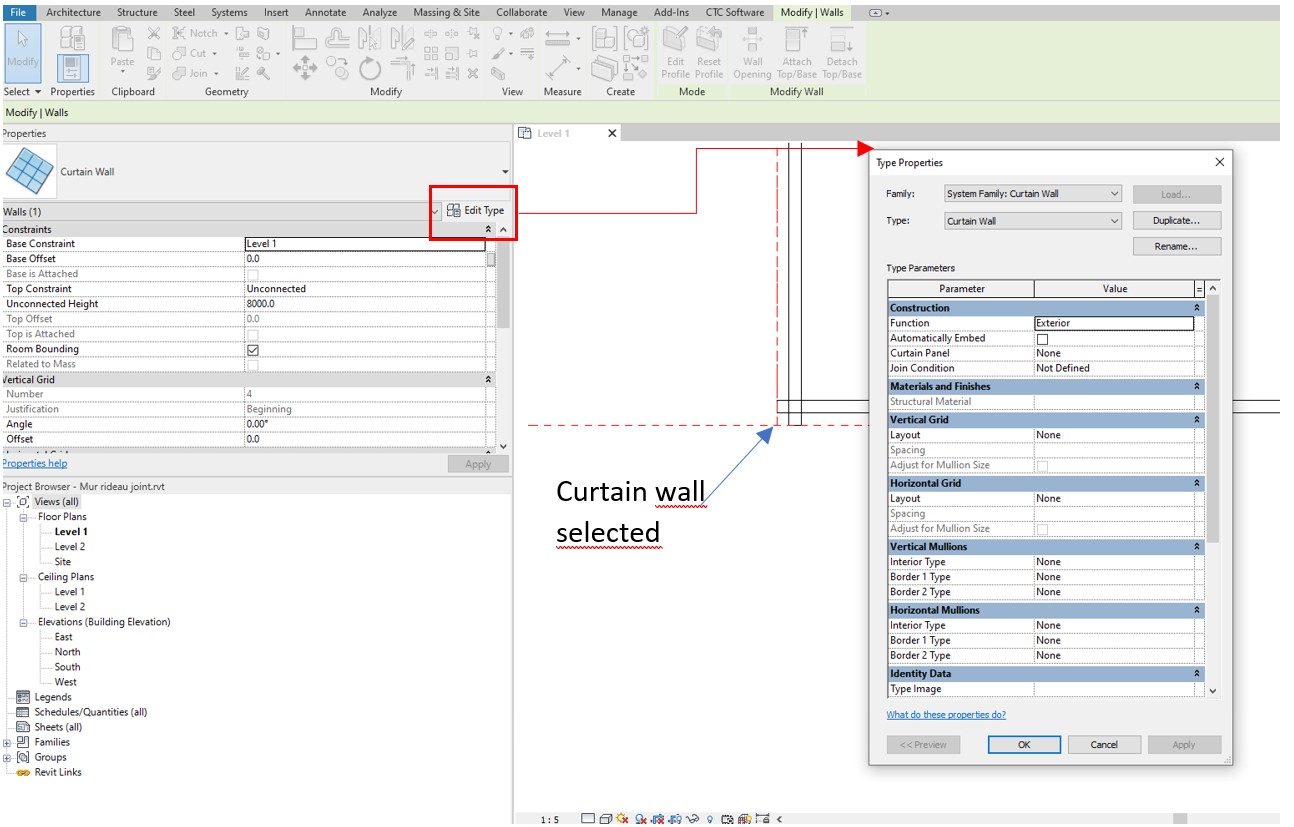
CREATE A NEW TYPE OF CW (CW= curtain wall)
Select the vertical element of the curtain wall, go to the properties window and click on “edit type”;
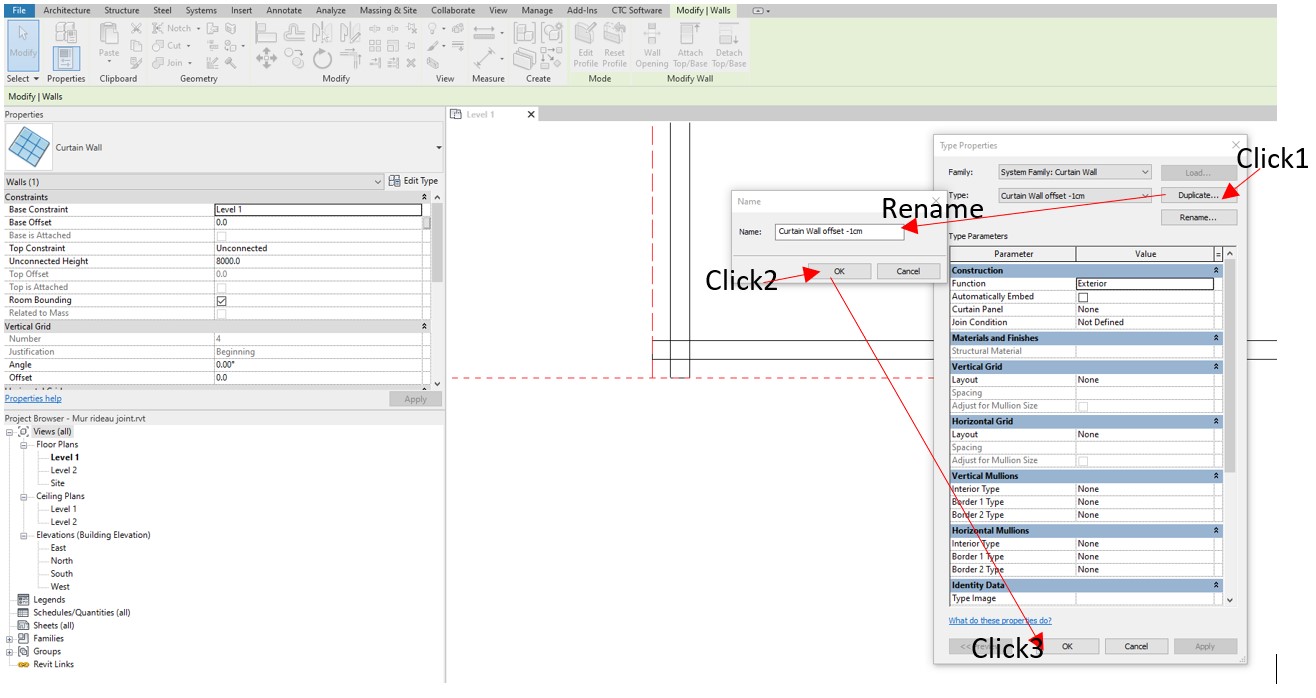
When the dialogue menu opens, click on duplicate and rename your new type of CW:
CREATE A NEW TYPE OF CW
When the dialogue menu opens, give a new name to your new type of curtain wall as it follows:
“Curtain wall offset-1cm”. Finally click OK, (click 2and 3).
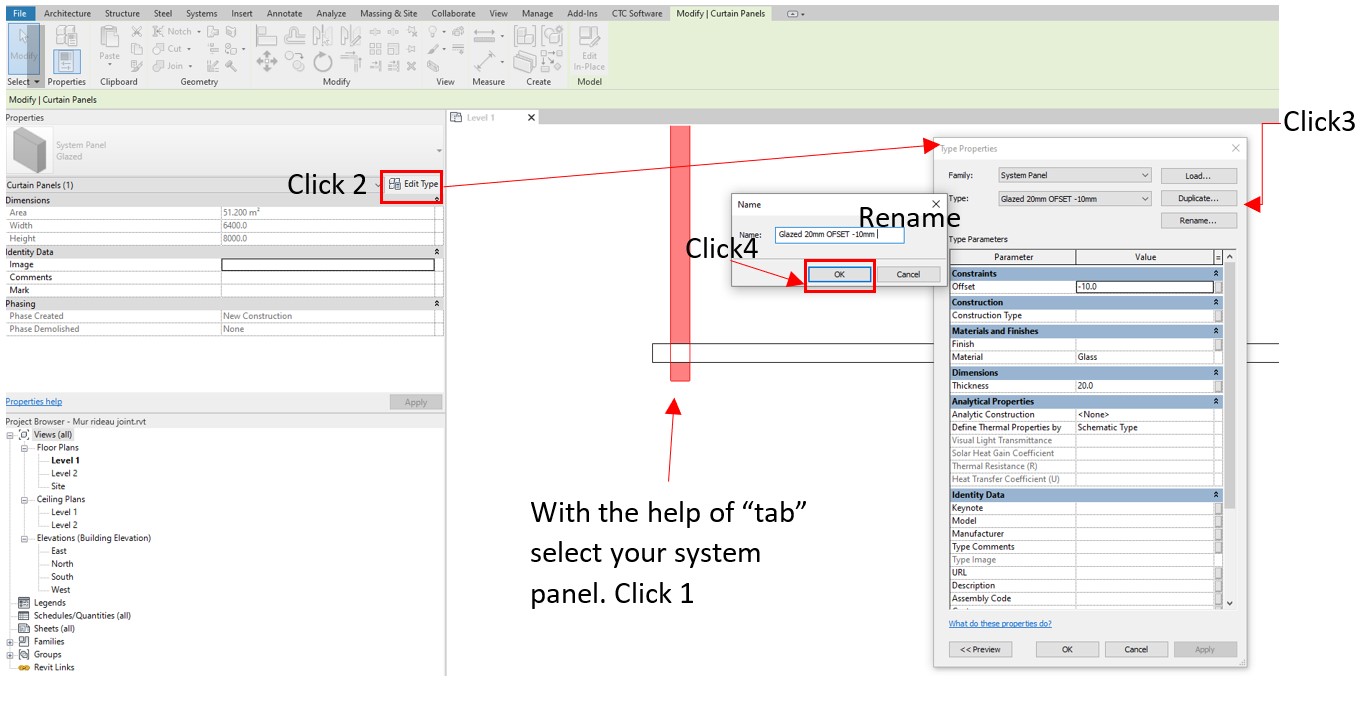
CREATE A NEW TYPE OF SYSTEM PANEL
Tapping on the key tab, click and select the system panel (put your cursor over it and press tab until you can select it) of your curtain wall.
Go to the properties window and click on “edit type”.
Click on duplicate then rename the system panel that you are creating and click ok.
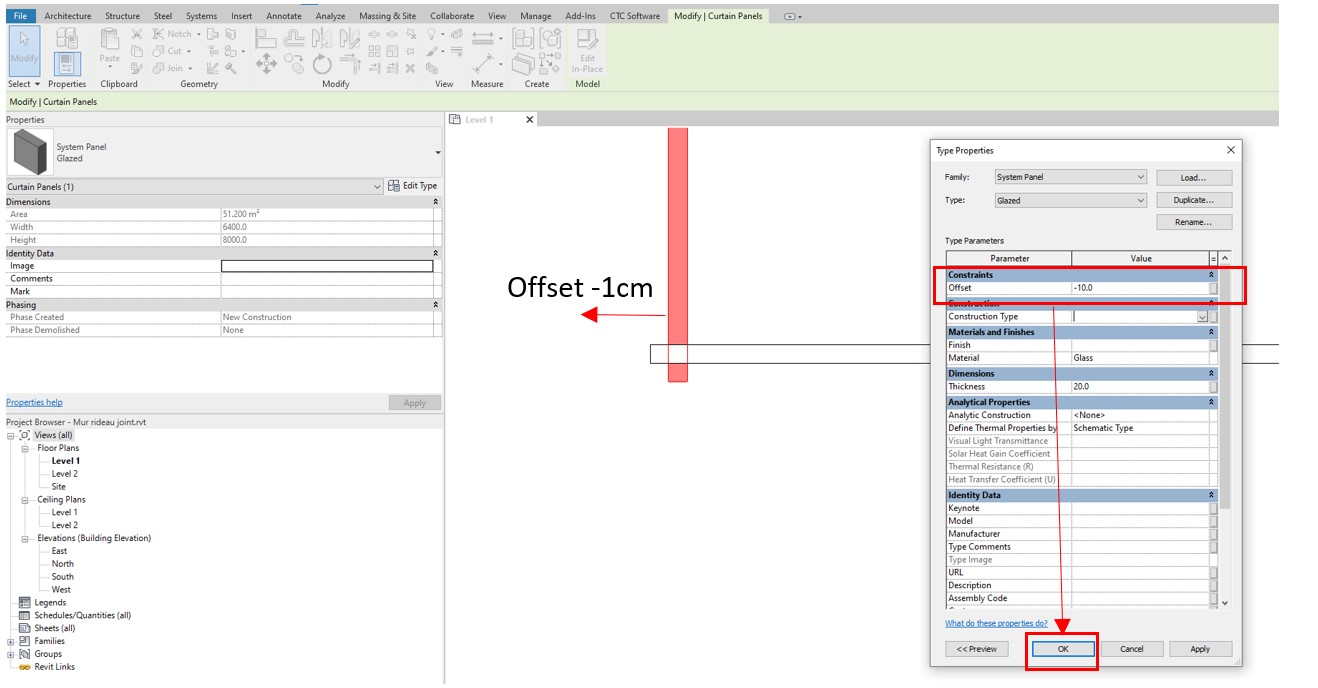
APPLY THE OFFSET -1cm
In the type properties window, type -1cm inside the “offset” box (half of the system panel thickness), then click ok.
The system panel will move to the left one centimeter.
And Voilà!! The first panel has been moved to achieve a better joint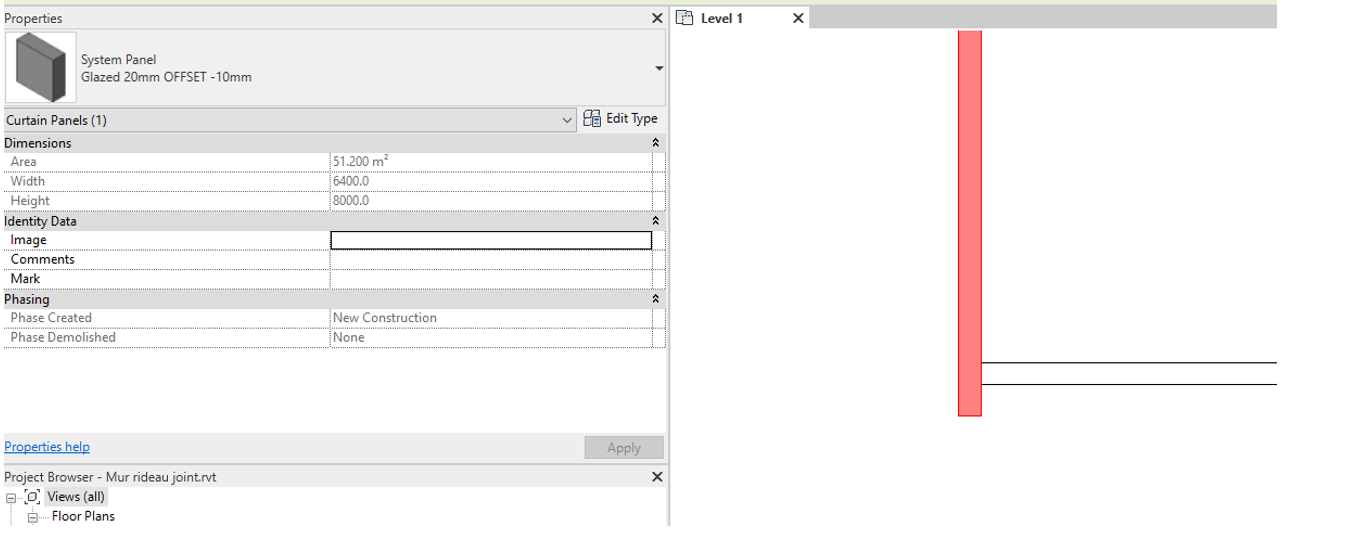
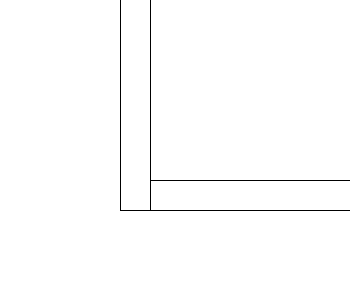
PROCES FOR THE SECOND SYSTEM PANEL
Select the horizontal element of your Curtain wall, repeat the instructions above, but this time applying an offset of +1cm so the panel will shift down 1cm, to obtain the result shown below.
Ces articles peuvent vous intéresser :

Après l'installation, vous constatez l'absence d'icones ou de barres d'outils. [...]

La mise à jour REVIT 2027.2 vient de sortir. Plusieurs [...]

Ou comment Afficher/Masquer simplement les pastilles des "Problèmes" dans le [...]
Revit 2027 propose un outil de numérotation fondé sur des [...]