

Add in Revit « Room finishing »
If you ever asked yourself how to do a floor finishing with a skirting board in very few clicks, please continue reading.
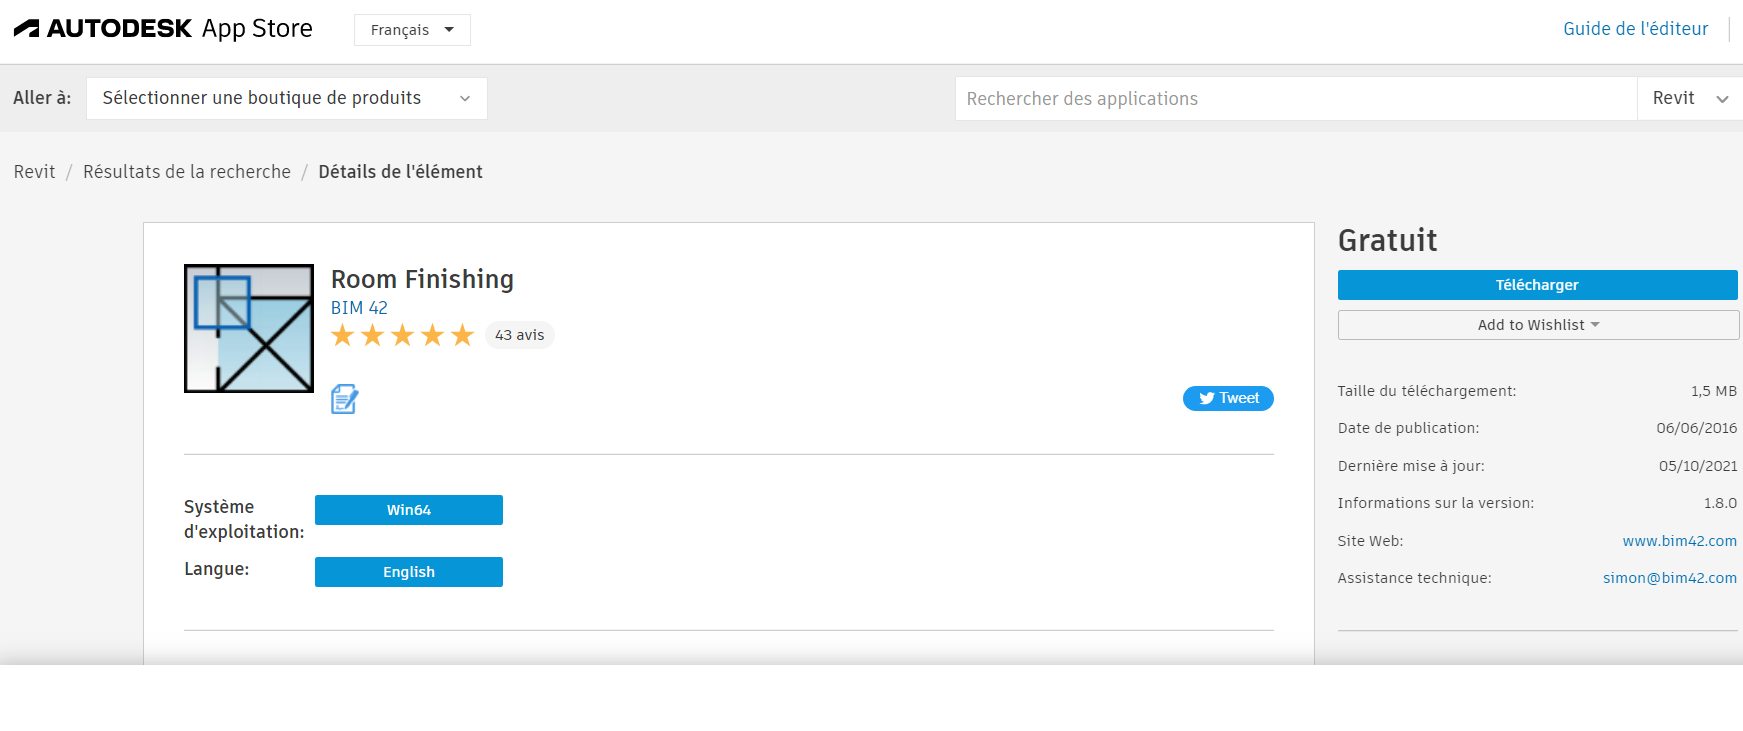
First, please download the application “Room finishing” from the Autodesk App Store as shown on the image below (don’t forget to close all Revit windows first!):
Once installed go to the “Add ins tab” to make sur you have it

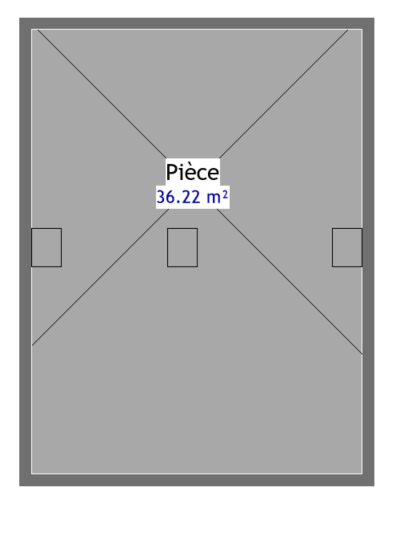 Now let’s get started, please choose a room from your project, make sure to do it on a floor plan (the add in only creates the changes on floor plan), also check if you have already the materials to be applied: the room created, a floor and walls.
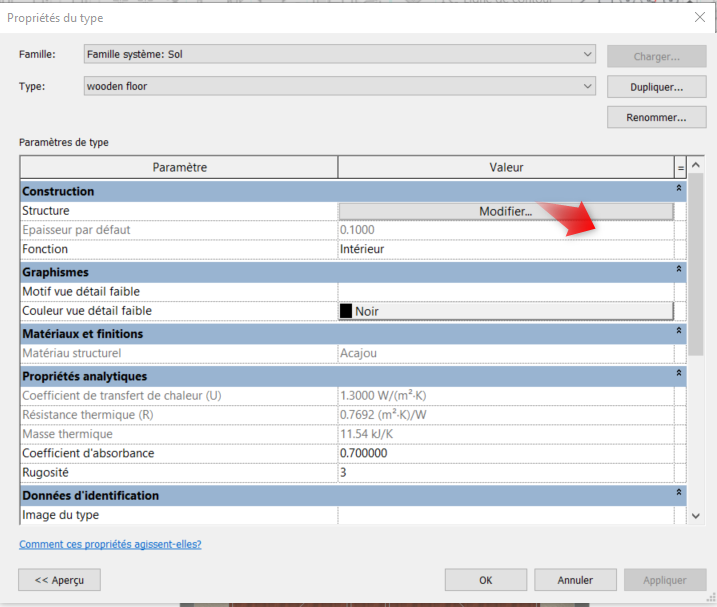
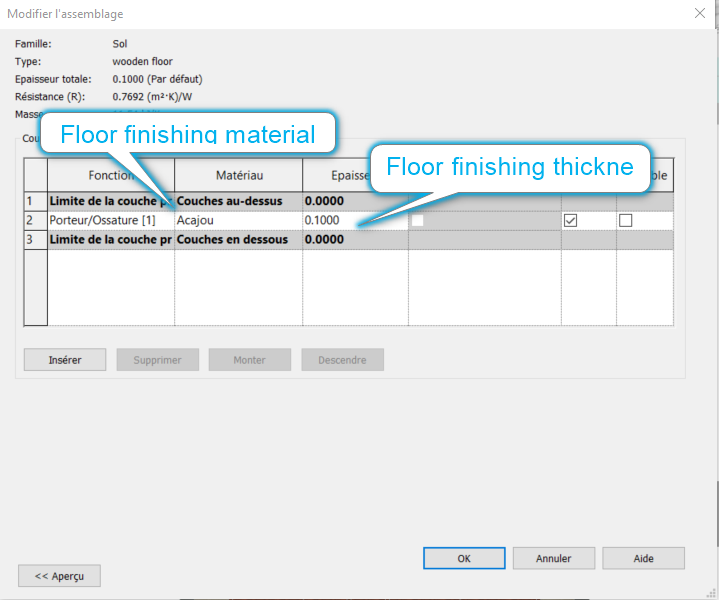
Before starting to use the add in, please Create a type of floor with the thickness and material wanted for the floor finishing
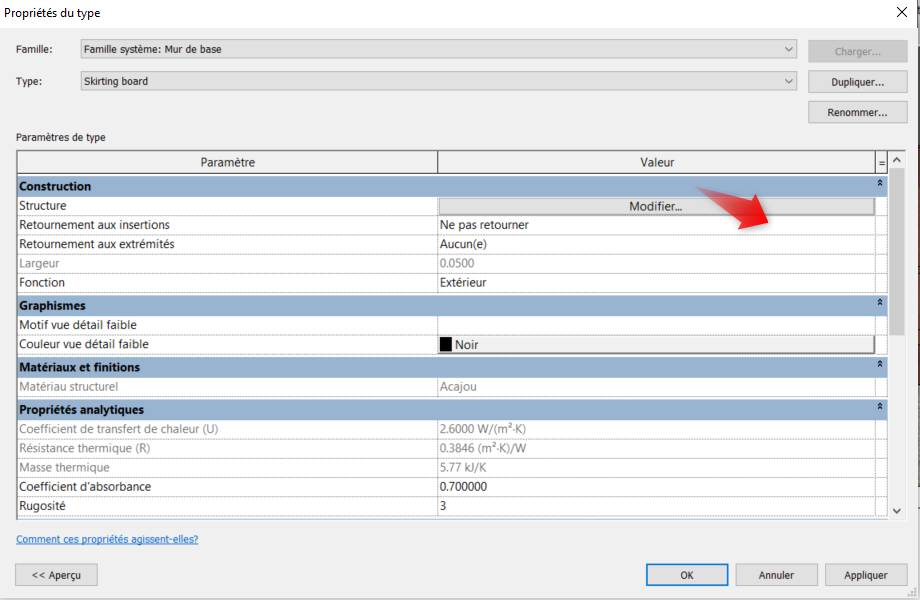
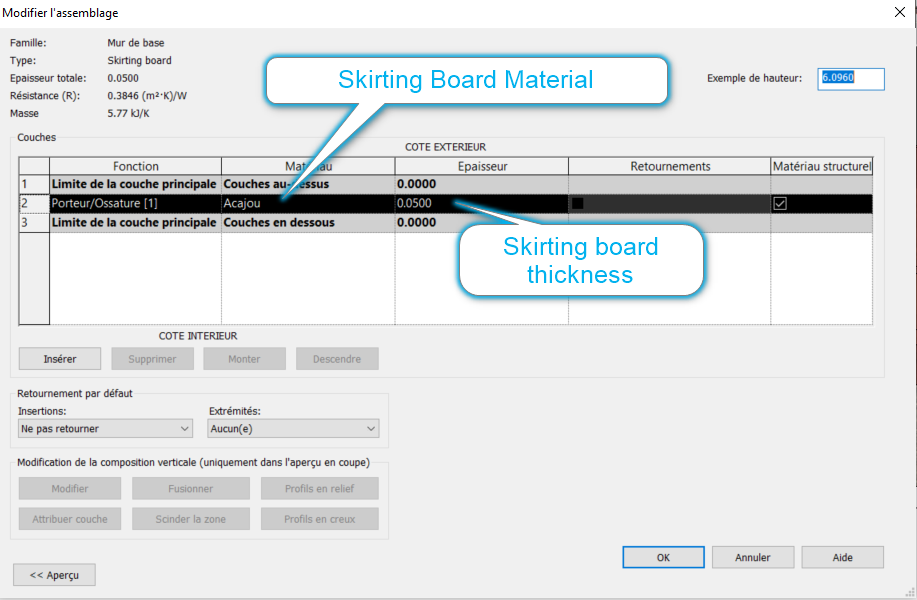
Also you have to create a type of wall with the thickness and material wanted for the skirting board.
Now we are ready to use the add in “Room finishing”, to do so please follow the instructions here below:
1.- Create a floor finishing:
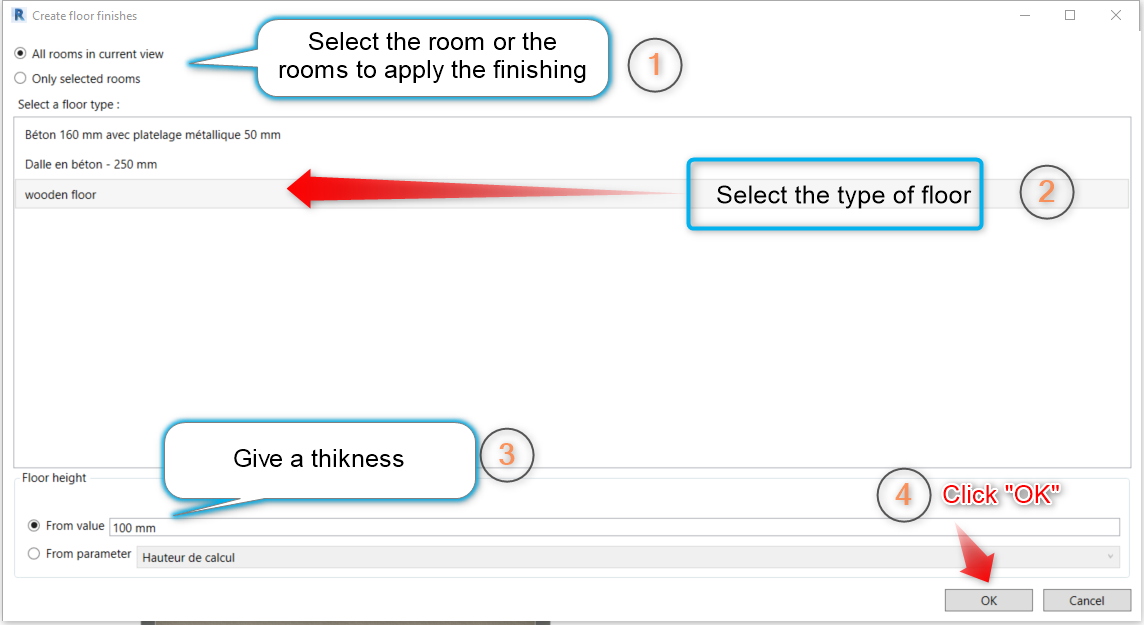
 Go to the add in “Room finishing” and choose the option “floor finishes” as shown on the gif below
Now you are able to choose the type of floor, the thickness of the finishing and the rooms where to apply the finishing you would like, as seen below:
2.- Create a skirting board
You must follow the same process as for the floors. Please notice that the skirting board can be applied to walls as well as columns automatically.
Go to the add in “Room finishing” and choose the option “skirting Board” and follow the step by step here below:
- Choose the room or the rooms
- Give a height to the skirting board (check the units of your project)
- Choose the type of wall with the material chosen
- Tick the box
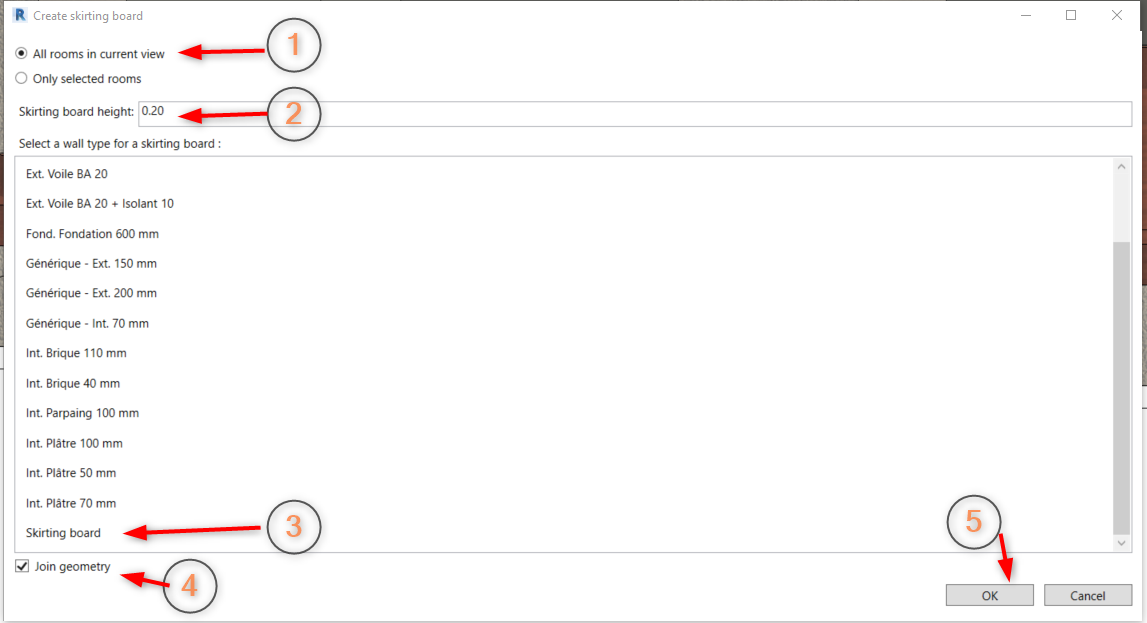 Click ok
This is the result:

See you next month for a follow up on our blog !
Ces articles peuvent vous intéresser :

Après l'installation, vous constatez l'absence d'icones ou de barres d'outils. [...]
La mise à jour REVIT 2027.2 vient de sortir. Plusieurs [...]

Ou comment Afficher/Masquer simplement les pastilles des "Problèmes" dans le [...]
Revit 2027 propose un outil de numérotation fondé sur des [...]